# Windows - Windows Admin Center

Serveur d'administration des infrastructures Microsoft.

# WindowsAdminCenter - Installation

<table id="bkmrk-difficult%C3%A9%2A-%3Cdescrip" style="border-collapse: collapse; width: 100%; height: 46.8px; border-width: 1px; border-style: hidden;"><colgroup><col style="width: 20%;"></col><col style="width: 80%;"></col></colgroup><tbody><tr style="height: 46.8px;"><td style="height: 46.8px; border: 1px groove rgb(52,73,94);">[![image.png](https://docs.labs404.fr/uploads/images/gallery/2026-07/scaled-1680-/kcDnovice-png.png)](https://docs.labs404.fr/uploads/images/gallery/2026-07/scaled-1680-/kcDnovice-png.png)  
</td><td style="height: 46.8px; border-width: 1px; background-color: rgb(236,202,250); vertical-align: top;">Difficulté : Novice

Notions : Administration center, Windows, Service web.

</td></tr></tbody></table>

---

### <span style="color: rgb(52,73,94);">**<span style="text-decoration: underline;">I. Introduction</span>**</span>

Cette procédure vise à décrire le processus d'installation de Windows Admin Center sur un serveur "On Premises".

<p class="callout danger">**Prérequis** : Un certificat TLS doit avoir été généré préalablement et placé sur le serveur dans le magasin "Web Hosting" pour l'utilisation avec un certificat externe. Sinon, possibilité d'utiliser un certificat auto-signé lors de l'installation.</p>

---

### <span style="color: rgb(52,73,94);">**<span style="text-decoration: underline;">II. Installation</span>**</span>

Télécharger Windows Admin Center : <span style="color: rgb(52,73,94);">**<span style="text-decoration: underline;">[Windows Admin Center | Centre d’évaluation Microsoft](https://www.microsoft.com/fr-fr/evalcenter/evaluate-windows-admin-center)</span>**</span>

Lancer l'installation.

[![image.png](https://docs.labs404.fr/uploads/images/gallery/2026-07/scaled-1680-/74Timage-png.png)](https://docs.labs404.fr/uploads/images/gallery/2026-07/scaled-1680-/74Timage-png.png)

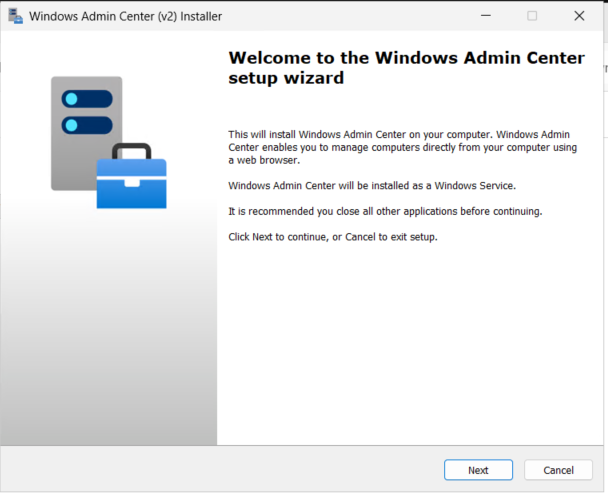
Sur la première page, juste faire '<span style="color: rgb(132,63,161);">***Next***</span>'.

[![image.png](https://docs.labs404.fr/uploads/images/gallery/2026-07/scaled-1680-/MWEimage-png.png)](https://docs.labs404.fr/uploads/images/gallery/2026-07/scaled-1680-/MWEimage-png.png)

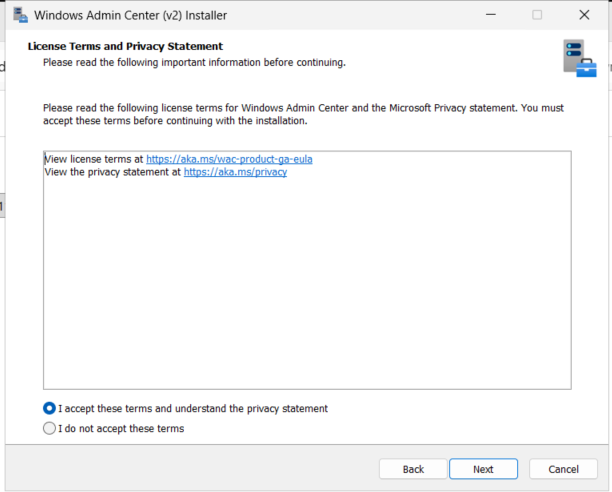
Cocher '<span style="color: rgb(132,63,161);">***I accept these terms and understand the privacy statement***</span>' puis faire '<span style="color: rgb(132,63,161);">***Next***</span>'.

[![image.png](https://docs.labs404.fr/uploads/images/gallery/2026-07/scaled-1680-/T0simage-png.png)](https://docs.labs404.fr/uploads/images/gallery/2026-07/scaled-1680-/T0simage-png.png)

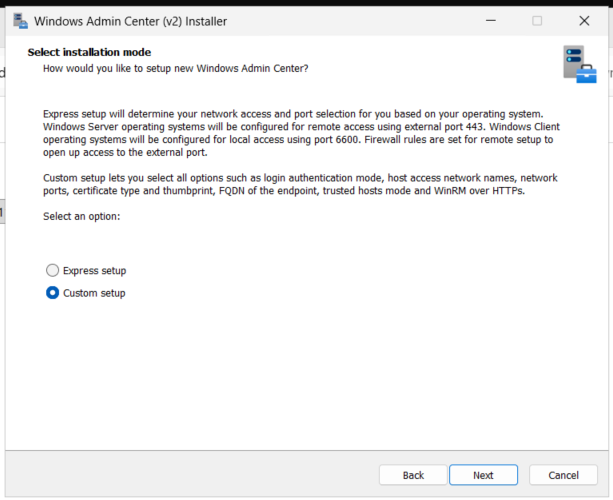
Choisir '<span style="color: rgb(132,63,161);">***Custom setup***</span>' puis faire '<span style="color: rgb(132,63,161);">***Next***</span>'.

[![image.png](https://docs.labs404.fr/uploads/images/gallery/2026-07/scaled-1680-/VXPimage-png.png)](https://docs.labs404.fr/uploads/images/gallery/2026-07/scaled-1680-/VXPimage-png.png)

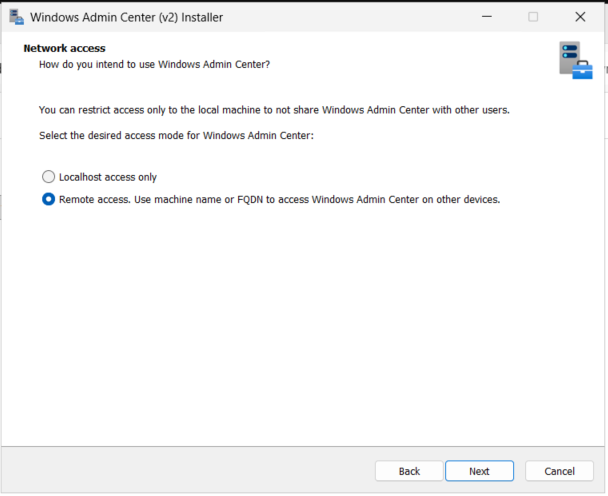
Si il s'agit d'un serveur stronghold qui sera utilisé à distance, cocher '<span style="color: rgb(132,63,161);">***Remote access. Use machine name or FQDN to access Windows Admin Center on other devices***</span>'. Sinon, laisse par défaut. Puis faire '<span style="color: rgb(132,63,161);">***Next***</span>'.

[![image.png](https://docs.labs404.fr/uploads/images/gallery/2026-07/scaled-1680-/7vvimage-png.png)](https://docs.labs404.fr/uploads/images/gallery/2026-07/scaled-1680-/7vvimage-png.png)

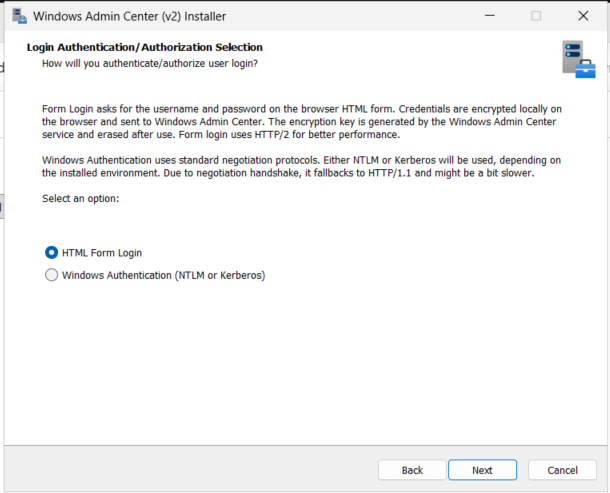
Garder l'option '<span style="color: rgb(132,63,161);">***HTML for login***</span>'. Puis faire '<span style="color: rgb(132,63,161);">***Next***</span>'.

[![image.png](https://docs.labs404.fr/uploads/images/gallery/2026-07/scaled-1680-/7Y1image-png.png)](https://docs.labs404.fr/uploads/images/gallery/2026-07/scaled-1680-/7Y1image-png.png)

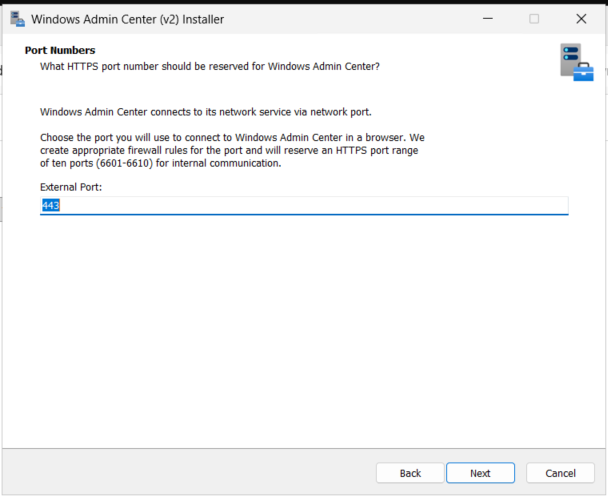
Laisser le port HTTPS par défaut. Puis faire '<span style="color: rgb(132,63,161);">***Next***</span>'.

[![image.png](https://docs.labs404.fr/uploads/images/gallery/2026-07/scaled-1680-/t4zimage-png.png)](https://docs.labs404.fr/uploads/images/gallery/2026-07/scaled-1680-/t4zimage-png.png)

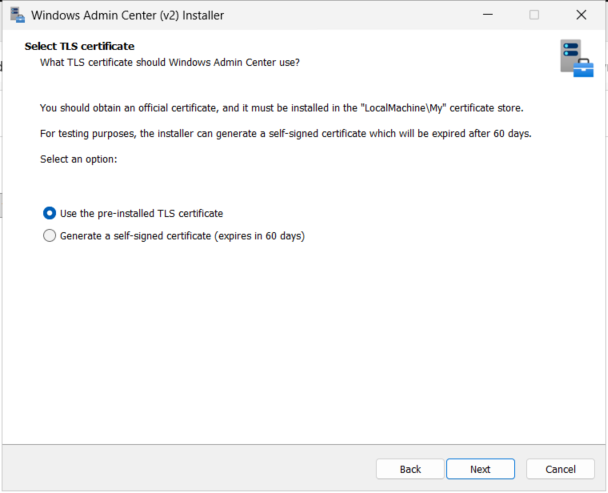
Deux solutions :

- soit utiliser un certificat auto-signé (celui-ci va être généré lors de l'installation).
- utiliser un certificat déjà installé sur la machine.

[![image.png](https://docs.labs404.fr/uploads/images/gallery/2026-07/scaled-1680-/IEmimage-png.png)](https://docs.labs404.fr/uploads/images/gallery/2026-07/scaled-1680-/IEmimage-png.png)
<p class="callout info">**Info** : Dans tous les cas, le certificat pourra être changé à posteriori avec : [WindowsAdminCenter - Mise à jour du certificat](https://docs.labs404.fr/books/roles-services/page/windowsadmincenter-mise-a-jour-du-certificat "WindowsAdminCenter - Mise à jour du certificat")</p>

<details id="bkmrk-certificat-pr%C3%A9-insta"><summary>Certificat pré-installé</summary>

Choisir le thumbprint du certificat à utiliser. Puis faire '<span style="color: rgb(132,63,161);">***Next***</span>'.

[![image.png](https://docs.labs404.fr/uploads/images/gallery/2026-07/scaled-1680-/s82image-png.png)](https://docs.labs404.fr/uploads/images/gallery/2026-07/scaled-1680-/s82image-png.png)

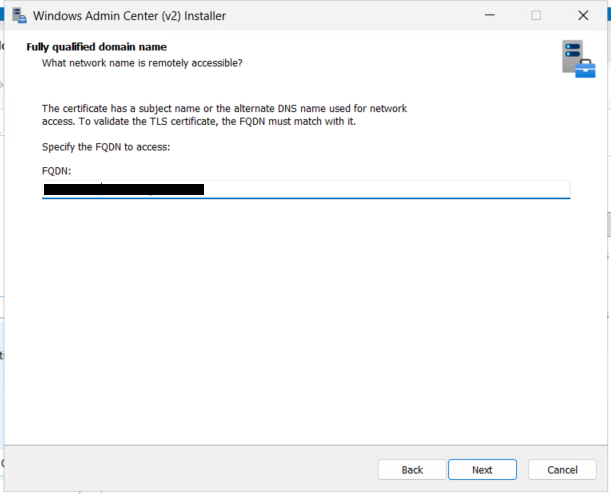
</details>Entrer le FQDN du serveur qui sera utilisé pour accéder à l'admin center. Puis faire '<span style="color: rgb(132,63,161);">***Next***</span>'.

<p class="callout success">**Astuce** : Celui-ci pourra être un alias (CNAME).</p>

[![image.png](https://docs.labs404.fr/uploads/images/gallery/2026-07/scaled-1680-/yqcimage-png.png)](https://docs.labs404.fr/uploads/images/gallery/2026-07/scaled-1680-/yqcimage-png.png)

Choisir si seuls les postes du domaines doivent accéder au serveur ou si des postes externes au domaines y seront amenés.

[![image.png](https://docs.labs404.fr/uploads/images/gallery/2026-07/scaled-1680-/XqNimage-png.png)](https://docs.labs404.fr/uploads/images/gallery/2026-07/scaled-1680-/XqNimage-png.png)
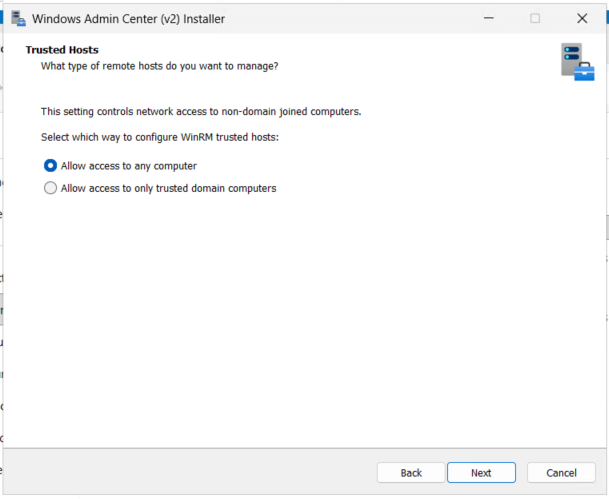
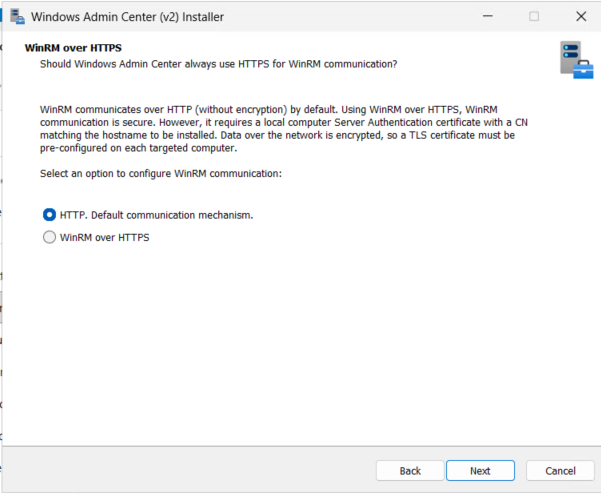
Sélectionner le protocole de transport qui sera utilisé pour WinRM.

(Pour un environement de lab, choisir '<span style="color: rgb(132,63,161);">***HTTP, Default communication mechanism***</span>'.

[![image.png](https://docs.labs404.fr/uploads/images/gallery/2026-07/scaled-1680-/61ximage-png.png)](https://docs.labs404.fr/uploads/images/gallery/2026-07/scaled-1680-/61ximage-png.png)

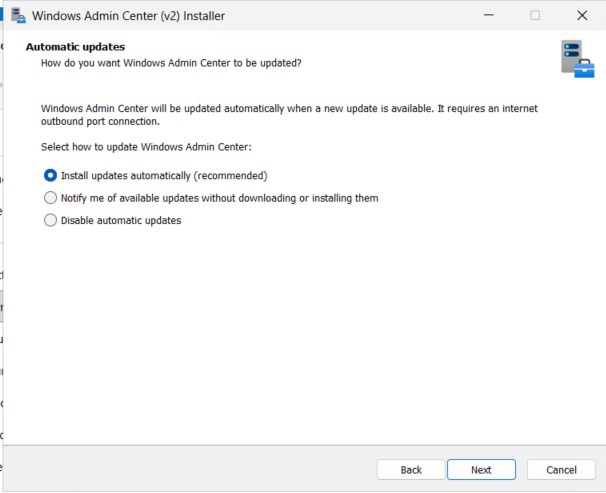
Sélectionner '<span style="color: rgb(132,63,161);">***Install updates automatically (recommended)***</span>' puis faire '<span style="color: rgb(132,63,161);">***Next***</span>'.

[![image.png](https://docs.labs404.fr/uploads/images/gallery/2026-07/scaled-1680-/70jimage-png.png)](https://docs.labs404.fr/uploads/images/gallery/2026-07/scaled-1680-/70jimage-png.png)

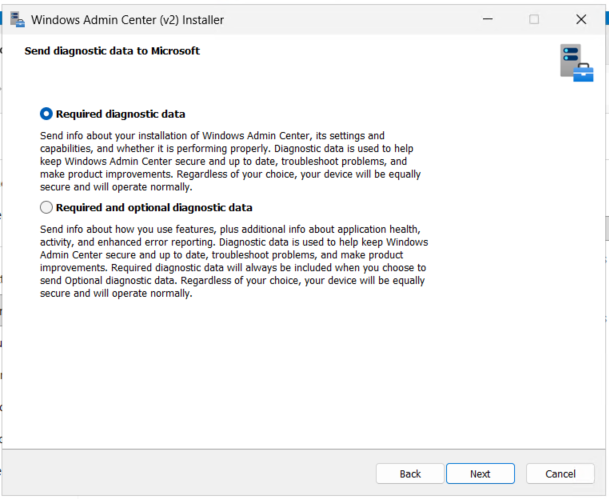
Sélectionner '<span style="color: rgb(132,63,161);">***Required diagnostic data***</span>' puis faire '<span style="color: rgb(132,63,161);">***Next***</span>'.

[![image.png](https://docs.labs404.fr/uploads/images/gallery/2026-07/scaled-1680-/sSlimage-png.png)](https://docs.labs404.fr/uploads/images/gallery/2026-07/scaled-1680-/sSlimage-png.png)

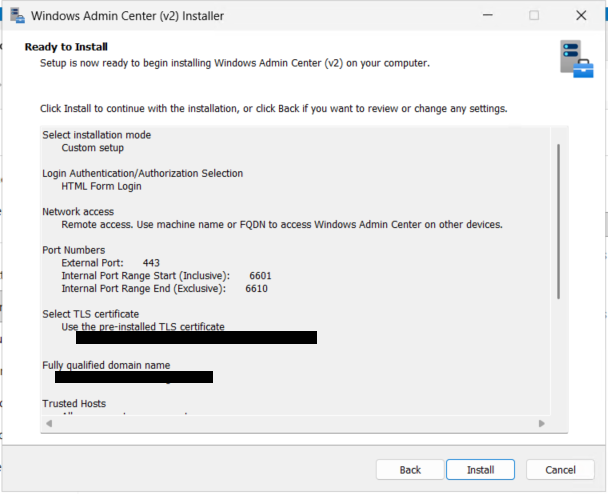
Revoir les paramètres et cliquer sur '<span style="color: rgb(132,63,161);">***Install***</span>'.

[![image.png](https://docs.labs404.fr/uploads/images/gallery/2026-07/scaled-1680-/GWeimage-png.png)](https://docs.labs404.fr/uploads/images/gallery/2026-07/scaled-1680-/GWeimage-png.png)

Attendre la fin de l'installation.

[![image.png](https://docs.labs404.fr/uploads/images/gallery/2026-07/scaled-1680-/Vs3image-png.png)](https://docs.labs404.fr/uploads/images/gallery/2026-07/scaled-1680-/Vs3image-png.png)
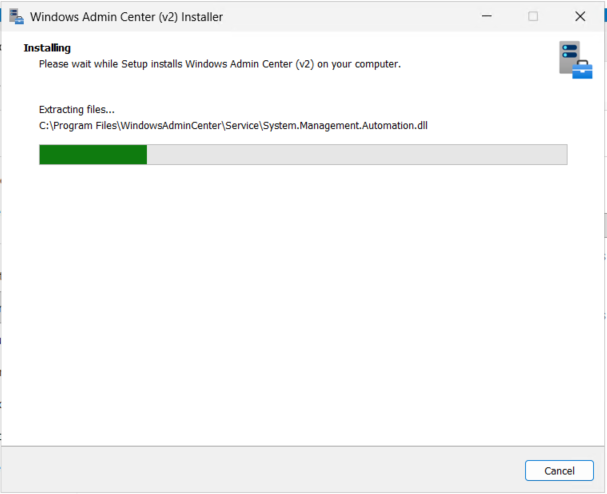
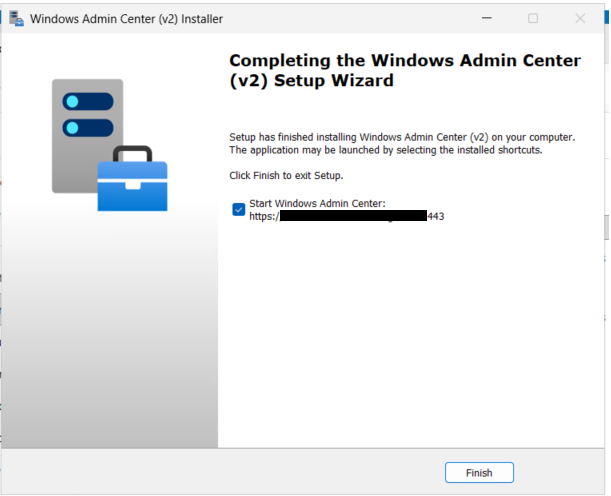
A la fin de l'installation, l'écran suivant s'affiche :

[![image.png](https://docs.labs404.fr/uploads/images/gallery/2026-07/scaled-1680-/ox7image-png.png)](https://docs.labs404.fr/uploads/images/gallery/2026-07/scaled-1680-/ox7image-png.png)
---

### <span style="color: rgb(52,73,94);">**<span style="text-decoration: underline;">III. Configuration</span>**</span>

Il est maintenant possible de se connecter avec les identifiants windows à la page web.

[![image.png](https://docs.labs404.fr/uploads/images/gallery/2026-07/scaled-1680-/AoCimage-png.png)](https://docs.labs404.fr/uploads/images/gallery/2026-07/scaled-1680-/AoCimage-png.png)
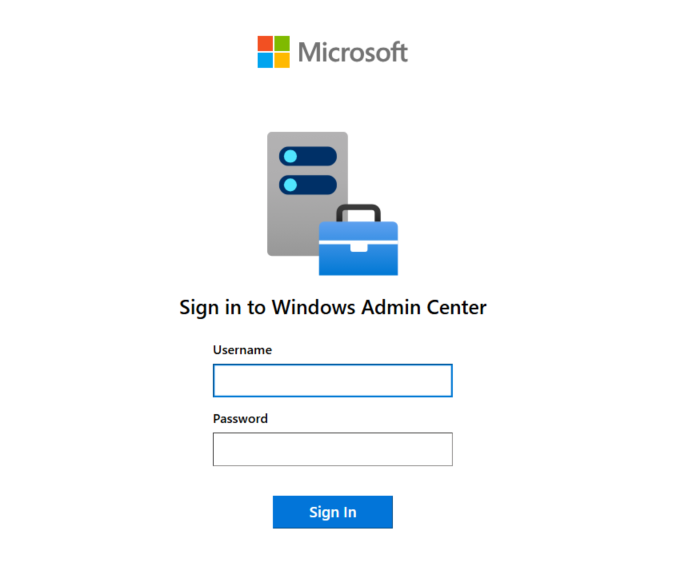
Le message suivant peut être fermé.

[![image.png](https://docs.labs404.fr/uploads/images/gallery/2026-07/scaled-1680-/05eimage-png.png)](https://docs.labs404.fr/uploads/images/gallery/2026-07/scaled-1680-/05eimage-png.png)
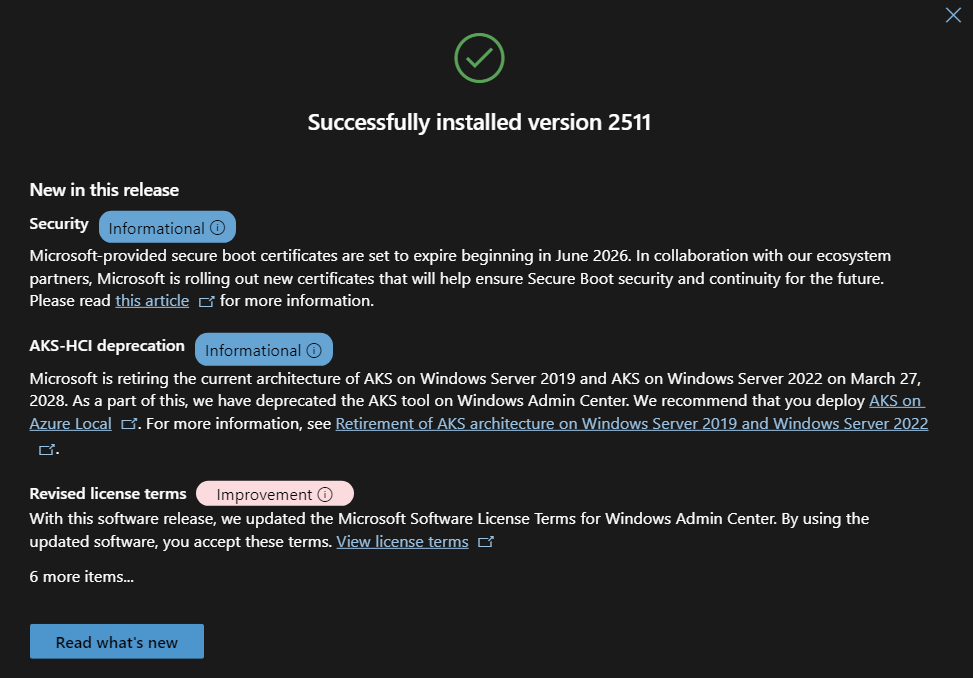
Pour installer les plugins nécessaires au sein du parc, cliquer sur le rouage en haut à gauche.

[![image.png](https://docs.labs404.fr/uploads/images/gallery/2026-07/scaled-1680-/WGVimage-png.png)](https://docs.labs404.fr/uploads/images/gallery/2026-07/scaled-1680-/WGVimage-png.png)

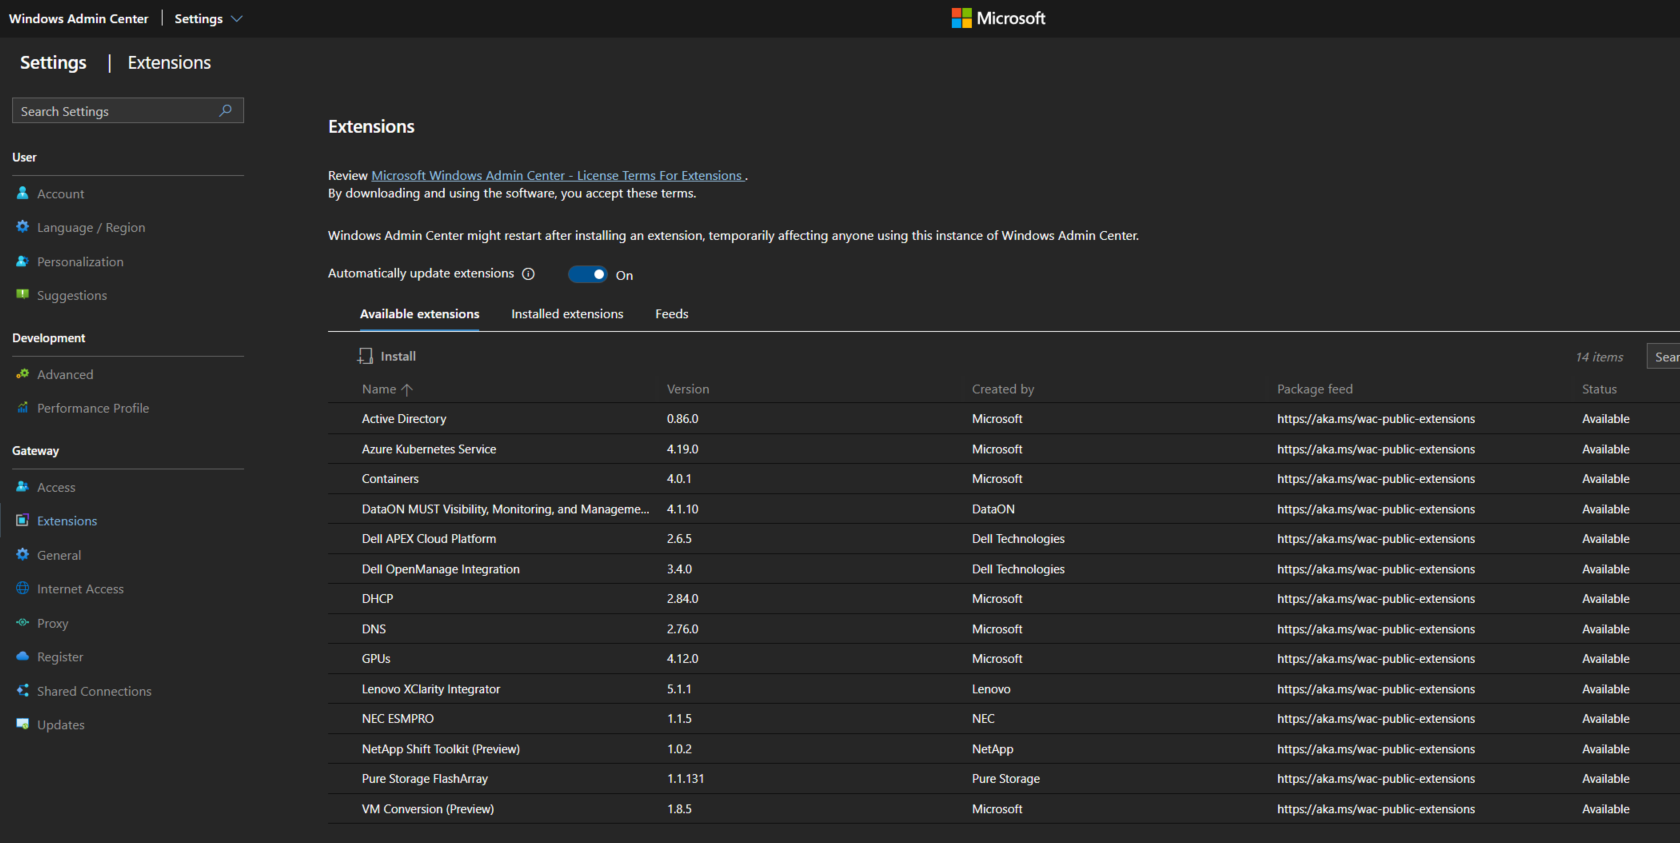
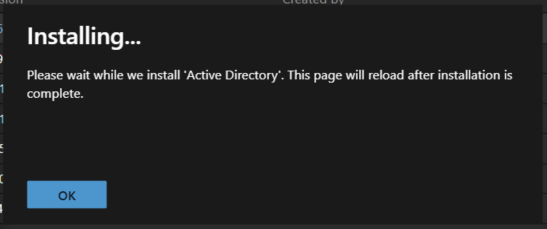
Dans le menu à gauche, aller sur '<span style="color: rgb(132,63,161);">***extensions***</span>'. Vérifier que le bouton '<span style="color: rgb(132,63,161);">***Automaticaly update extensions***</span>' est activé.

[![image.png](https://docs.labs404.fr/uploads/images/gallery/2026-07/scaled-1680-/WN6image-png.png)](https://docs.labs404.fr/uploads/images/gallery/2026-07/scaled-1680-/WN6image-png.png)

Il suffira de sélectionner celles à installer et cliquer sur '<span style="color: rgb(132,63,161);">***Install***</span>'.

[![image.png](https://docs.labs404.fr/uploads/images/gallery/2026-07/scaled-1680-/f4Jimage-png.png)](https://docs.labs404.fr/uploads/images/gallery/2026-07/scaled-1680-/f4Jimage-png.png)

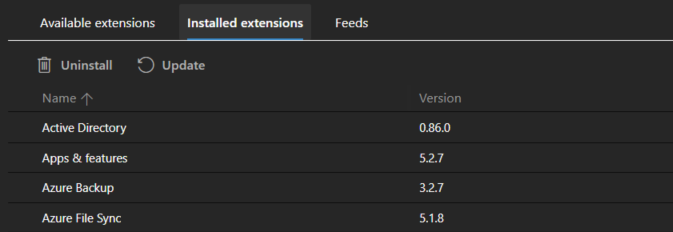
Puis pour les mettre à jour, aller sur '<span style="color: rgb(132,63,161);">***Installed extensions***</span>' et cliquer sur l'icône de mise à jour.

[![image.png](https://docs.labs404.fr/uploads/images/gallery/2026-07/scaled-1680-/8oDimage-png.png)](https://docs.labs404.fr/uploads/images/gallery/2026-07/scaled-1680-/8oDimage-png.png)
---

### <span style="color: rgb(52,73,94);">**<span style="text-decoration: underline;">IV. Ajout des serveurs</span>**</span>

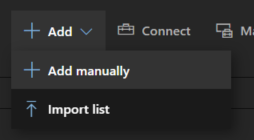
Pour ajouter des serveurs, sur l'écran principal, cliquer sur '<span style="color: rgb(132,63,161);">***+ Add***</span>' puis '<span style="color: rgb(132,63,161);">***Add manually***</span>'.

[![image.png](https://docs.labs404.fr/uploads/images/gallery/2026-07/scaled-1680-/hFeimage-png.png)](https://docs.labs404.fr/uploads/images/gallery/2026-07/scaled-1680-/hFeimage-png.png)

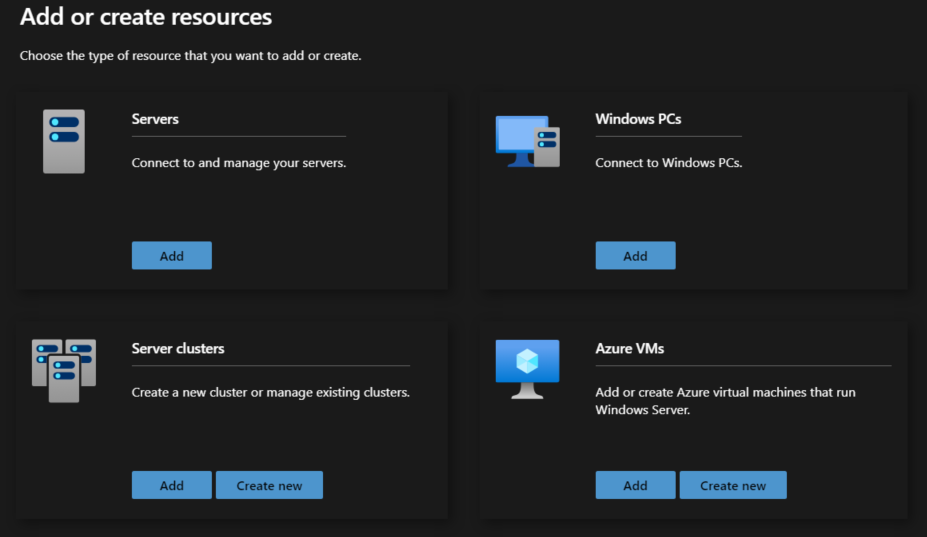
Choisir '<span style="color: rgb(132,63,161);">***Servers***</span>'.

[![image.png](https://docs.labs404.fr/uploads/images/gallery/2026-07/scaled-1680-/cCBimage-png.png)](https://docs.labs404.fr/uploads/images/gallery/2026-07/scaled-1680-/cCBimage-png.png)

# WindowsAdminCenter - Mise à jour du certificat

<table id="bkmrk-difficult%C3%A9%2A-%3Cdescrip" style="border-collapse: collapse; width: 100%; height: 46.8px; border-width: 1px; border-style: hidden;"><colgroup><col style="width: 20%;"></col><col style="width: 80%;"></col></colgroup><tbody><tr style="height: 46.8px;"><td style="height: 46.8px; border: 1px groove rgb(52,73,94);">[![image.png](https://docs.labs404.fr/uploads/images/gallery/2026-07/scaled-1680-/Ltbintermediaire-png.png)](https://docs.labs404.fr/uploads/images/gallery/2026-07/scaled-1680-/Ltbintermediaire-png.png)</td><td style="height: 46.8px; border-width: 1px; background-color: rgb(236,202,250); vertical-align: top;">Difficulté : Intermédiaire

Notions : Powershell, Windows admin center, certificats, pki

</td></tr></tbody></table>

---

### <span style="color: rgb(52,73,94);">**<span style="text-decoration: underline;">I. Introduction</span>**</span>

Cette procédure vise à décrire le processus de replacement ou renouvellement de certificat sur Windows Admin Center.

Cette opération ne peut se faire qu'en Powershell.

Un certificat aura été préalablement généré et placé dans le magasin Web Hosting de la machine.

---

### <span style="color: rgb(52,73,94);">**<span style="text-decoration: underline;">II. Remplacer le certificat WAC</span>**</span>

Importer le module Powershell de gestion de l'admin center.

```powershell
Import-Module "$env:ProgramFiles\WindowsAdminCenter\PowerShellModules\Microsoft.WindowsAdminCenter.Configuration"
```

[![image.png](https://docs.labs404.fr/uploads/images/gallery/2026-07/scaled-1680-/eiHimage-png.png)](https://docs.labs404.fr/uploads/images/gallery/2026-07/scaled-1680-/eiHimage-png.png)

Récupérer le Thumbprint du certificat voulu avec :

```powershell
Get-ChildItem -Path Cert:\LocalMachine\My
```

[![image.png](https://docs.labs404.fr/uploads/images/gallery/2026-07/scaled-1680-/NXAimage-png.png)](https://docs.labs404.fr/uploads/images/gallery/2026-07/scaled-1680-/NXAimage-png.png)

Appliquer le nouveau certificat avec :

```powershell
Set-WACCertificateSubjectName -Thumbprint "<thumbprint>"
```

[![image.png](https://docs.labs404.fr/uploads/images/gallery/2026-07/scaled-1680-/JWAimage-png.png)](https://docs.labs404.fr/uploads/images/gallery/2026-07/scaled-1680-/JWAimage-png.png)

Donner les droits au WAC de lire le certificat.

```powershell
Set-WACCertificateAcl -SubjectName "<subject name>"
```

[![image.png](https://docs.labs404.fr/uploads/images/gallery/2026-07/scaled-1680-/S4Uimage-png.png)](https://docs.labs404.fr/uploads/images/gallery/2026-07/scaled-1680-/S4Uimage-png.png)

Relancer le service WindowsAdminCenter avec :

```powershell
Restart-Service -Name WindowsAdminCenter
```

[![image.png](https://docs.labs404.fr/uploads/images/gallery/2026-07/scaled-1680-/nsNimage-png.png)](https://docs.labs404.fr/uploads/images/gallery/2026-07/scaled-1680-/nsNimage-png.png)