# WDS - Capture d'image Template (GUI)
| [](https://docs.labs404.fr/uploads/images/gallery/2026-07/scaled-1680-/2lzintermediaire-png.png) | Difficulté : Intermédiaire
Notions : Déploiement, installation système, réseau, démarrage sur le réseau.
|
---
### **I. Introduction**
Cette procédure fait suite à la procédure d'installation de WDS.
Elle vise à décrire le processus de capture d'une image Windows d'un poste '***Master***' pour pouvoir l'ajouter dans WDS et la déployer ensuite sur les autres postes.
---
### **II. Création de l'image de capture**
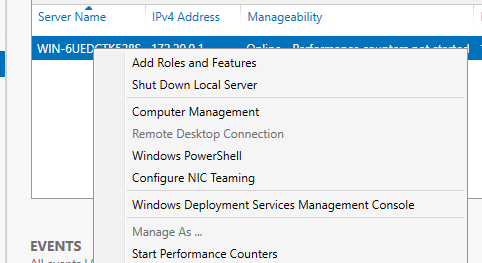
Ouvrir le gestionaire WDS.
[](https://docs.labs404.fr/uploads/images/gallery/2026-07/scaled-1680-/M8wimage-png.png)
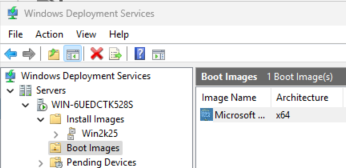
Aller dans '***Boot Images***'.
[](https://docs.labs404.fr/uploads/images/gallery/2026-07/scaled-1680-/VSjimage-png.png)
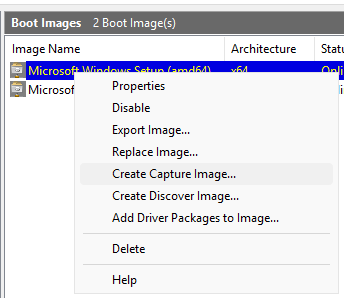
Clic droit sur l'image de boot souhaitée, puis faire '***Create Capture Image...***'.
[](https://docs.labs404.fr/uploads/images/gallery/2026-07/scaled-1680-/W9timage-png.png)
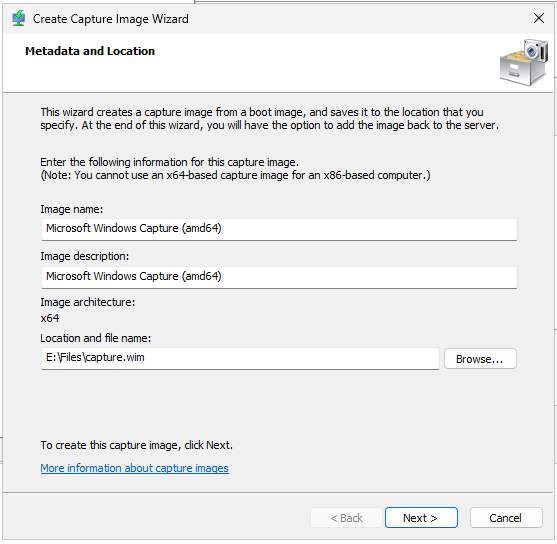
Choisir le nom de l'image, sa description et le répertoire où elle sera générée. Puis faire '***Next***'.
[](https://docs.labs404.fr/uploads/images/gallery/2026-07/scaled-1680-/B0zimage-png.png)
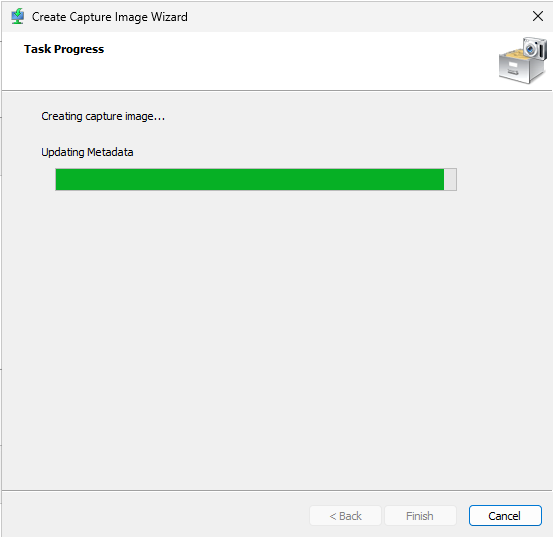
Attendre la fin de l'import.
[](https://docs.labs404.fr/uploads/images/gallery/2026-07/scaled-1680-/kpzimage-png.png)
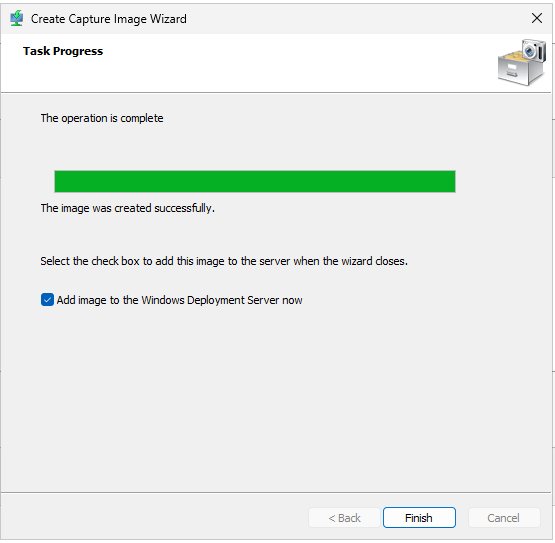
A la fin de l'import, cocher la case '***Add image to the windows Deployement Server Now***'. Puis faire '***Finish***'.
[](https://docs.labs404.fr/uploads/images/gallery/2026-07/scaled-1680-/uueimage-png.png)
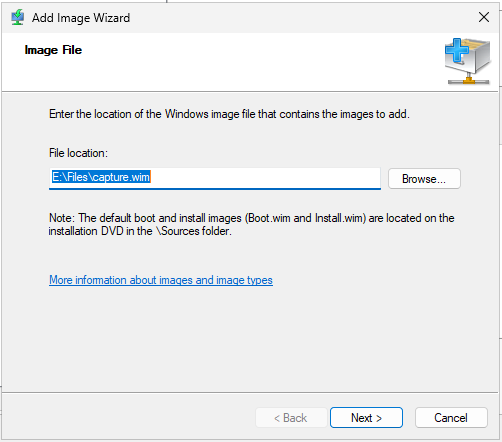
L'assistant d'import se lance. Laisser le chemin et faire '***Next***'.
[](https://docs.labs404.fr/uploads/images/gallery/2026-07/scaled-1680-/tzaimage-png.png)
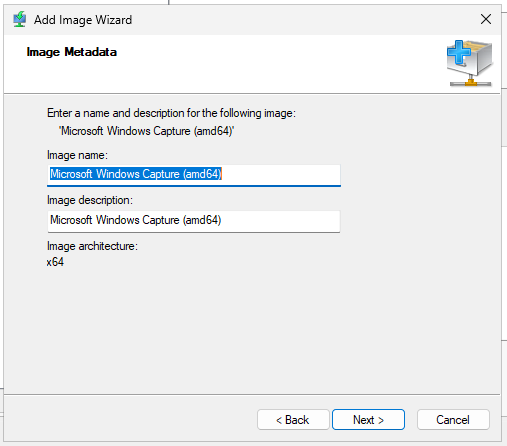
Laisser les valeurs précédemment définies et faire '***Next***'.
[](https://docs.labs404.fr/uploads/images/gallery/2026-07/scaled-1680-/eaOimage-png.png)
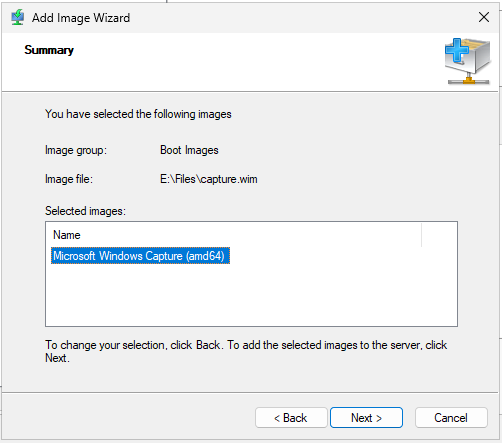
Cette page est juste un résumé. Faire '***Next***'.
[](https://docs.labs404.fr/uploads/images/gallery/2026-07/scaled-1680-/imKimage-png.png)
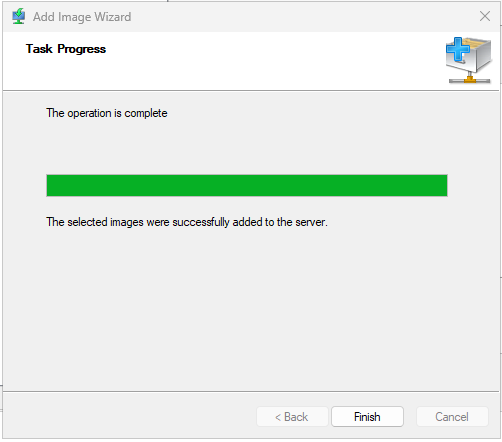
A la fin de l'import, Faire '***Finish***'.
[](https://docs.labs404.fr/uploads/images/gallery/2026-07/scaled-1680-/qZvimage-png.png)
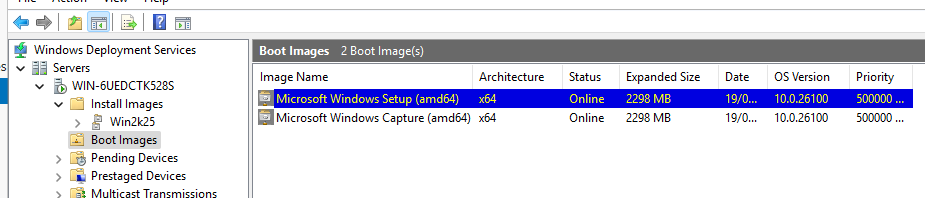
Les deux images de démarrages sont désormais disponibles.
[](https://docs.labs404.fr/uploads/images/gallery/2026-07/scaled-1680-/WJaimage-png.png)
**Conseil** : Si il est nécessaire d'ajouter des drivers à l'image, cela peut être fait à ce moment là.
---
### **III. Préparation du master**
Lancer une installation windows classique sur un poste qui servira de modèle.
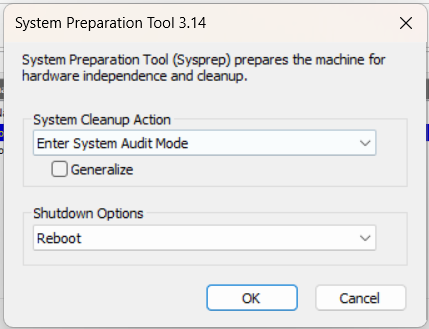
A la fin de l'installation, lancer le sysprep en mode '***Audit***', ne pas cocher la case Generalize et choisir '***Reboot***', puis cliquer sur '***OK***'.
[](https://docs.labs404.fr/uploads/images/gallery/2026-07/scaled-1680-/nAPimage-png.png)
L'ordinateur va alors redémarrer en mode audit du système.
Il est dès lors possible de faire toutes les modifications nécessaires en terme de paramétrage, personnalisation, installation de pilotes et logiciels, etc...
**Attention** : Ne pas ferme la fenêtre sysprep suite au redémarrage. La minimiser au besoin.
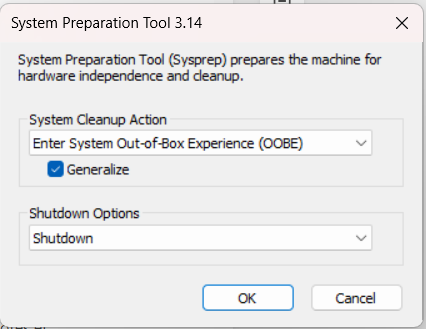
A la fin des manipulation, reprendre le sysprep, mais cette fois en mode '***OOBE***', cocher '***Generalize***' et choisir '***Shutdown***'. Puis valider avec '***OK***'.
[](https://docs.labs404.fr/uploads/images/gallery/2026-07/scaled-1680-/V6simage-png.png)
---
### **IV. Capture de l'image**
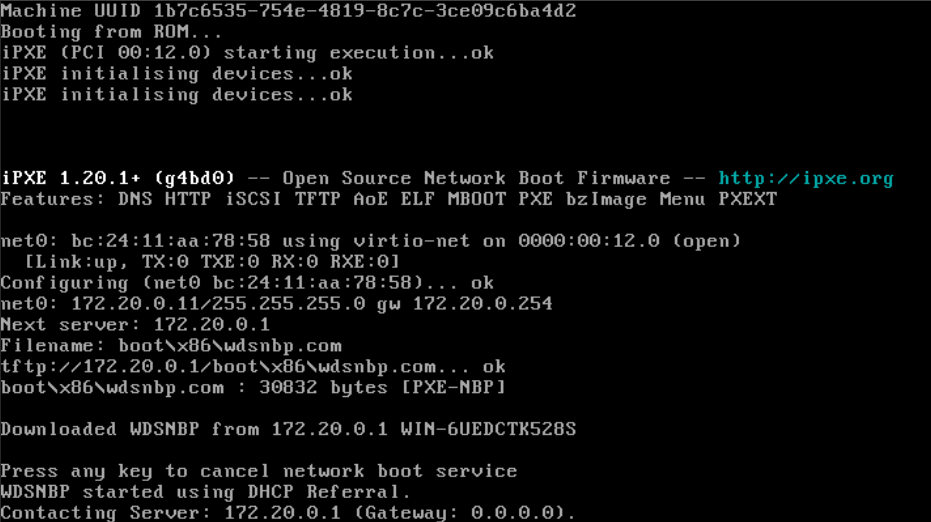
Démarrer le poste à capturer (master) en PXE sur le réseau.
[](https://docs.labs404.fr/uploads/images/gallery/2026-07/scaled-1680-/88Uimage-png.png)
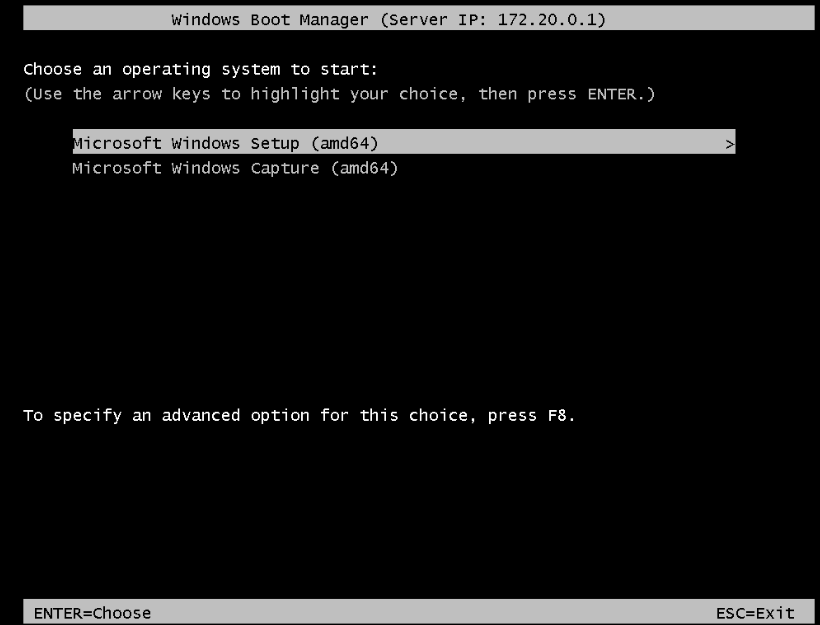
Choisir l'image de capture puis faire '***ENTER***'.
[](https://docs.labs404.fr/uploads/images/gallery/2026-07/scaled-1680-/smlimage-png.png)
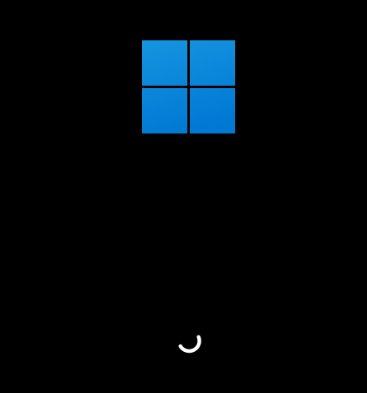
Attendre le chargement de l'image.
[](https://docs.labs404.fr/uploads/images/gallery/2026-07/scaled-1680-/YmAimage-png.png)
[](https://docs.labs404.fr/uploads/images/gallery/2026-07/scaled-1680-/Ex5image-png.png)